

-
 Phone:+86 189 2494 9366
-
 E-mail:info@zsshengshi.com
-
 No.5, north of the first road, Guyi Changweiyong manufacturingdistrict, Guzhen, Zhongshan, Guangdong, P.R.C
Swivel Joint Approval Process for B2B Buyers: Load Testing and Tolerance Checks

Key Takeaways: Approve a swivel joint against its actual mounting geometry, service load, adjustment torque, and finished-part tolerances—not appearance alone. Require traceable load-test results, post-cycle measurements, and production controls that keep approved performance consistent across batches.
The swivel joint approval process for B2B buyers should establish whether a joint will hold position, adjust predictably, and assemble consistently after finishing. A sample that feels smooth by hand may still creep under a lighting head, loosen after repeated adjustment, or bind when installed against the customer’s mounting face.
For procurement and engineering teams, approval must connect the drawing to measurable performance. The most useful acceptance package combines dimensional checks, a defined load-test method, adjustment-cycle testing, and a clear record of the material, finish, and assembly settings used for the samples.
Why Sample Approval Can Fail in Production
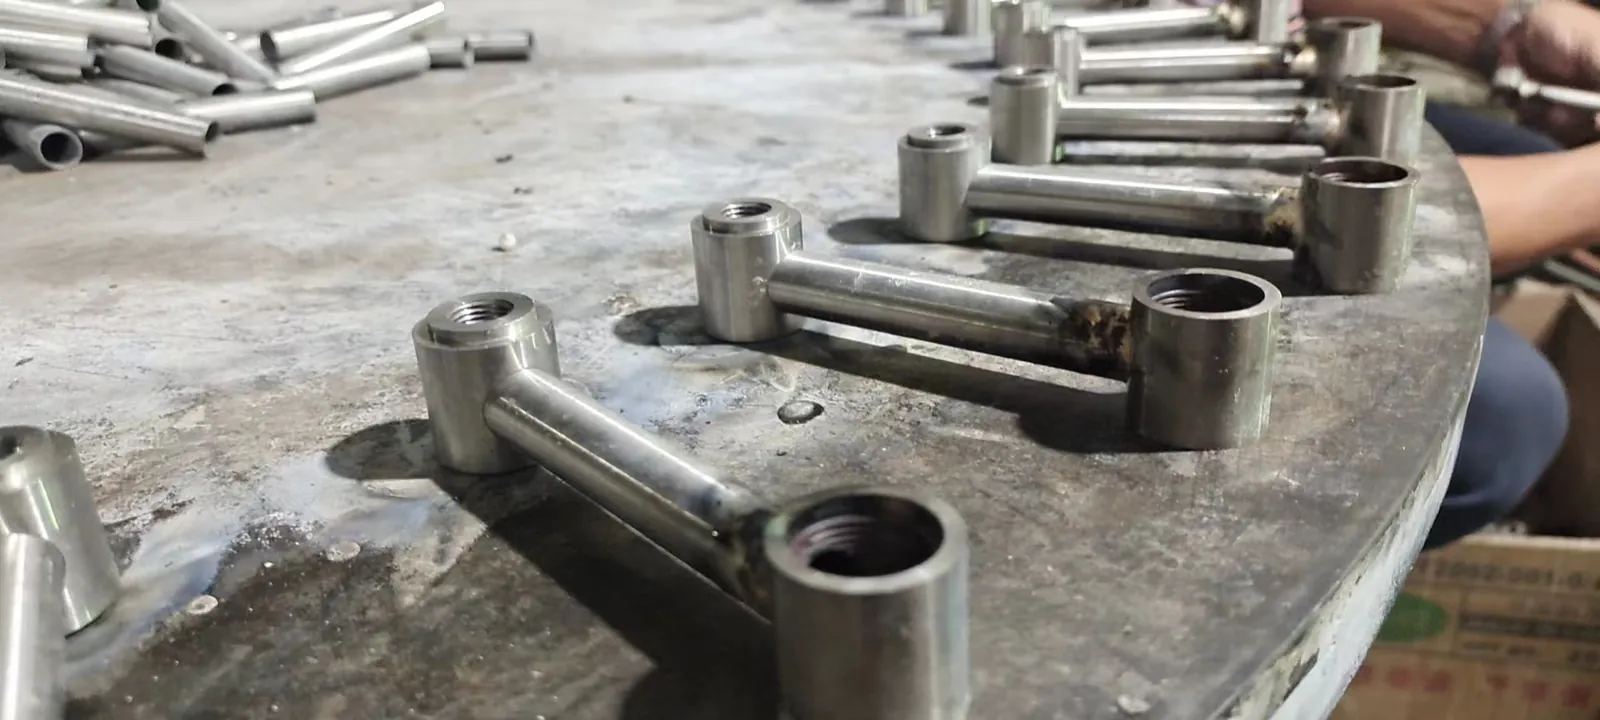
Swivel joints combine machined or cast bodies with pins, threaded connections, friction surfaces, washers, and locking components. Their performance depends on the assembly stack, not just individual dimensions. A small change in washer thickness, coating buildup, or fastener preload can turn an acceptable joint into one that slips or requires excessive force to move.
Prototype samples may receive extra deburring, selective fitting, or manual preload adjustment. These corrections can hide weaknesses in the normal production route. Buyers should therefore ask whether approval samples represent the intended tooling, finishing process, assembly method, and purchased components. A hand-fitted sample should not automatically authorize unrestricted mass production.
For lighting accessories, the joint may also carry internal wiring. Passing a mechanical load test does not establish electrical safety: rotation stops, cable routing, insulation clearance, and applicable luminaire requirements need separate verification.
Define the Load Case Before Testing
Start with the supported mass, its center of gravity, and the most demanding operating position. Joint demand is often a bending moment rather than a simple hanging weight. A 2 kg lighting head with its center of gravity 150 mm from the pivot produces approximately 2.9 N·m of gravitational moment when that offset is horizontal: moment equals force multiplied by perpendicular distance.
This example is not a recommended rating. The required test load and margin must reflect the product’s application, misuse risks, mounting arrangement, and applicable requirements. An axial pull test alone cannot demonstrate resistance to an offset load.
Distinguish holding performance from structural strength. A friction joint can remain intact yet drift under service load. Conversely, a locked joint can hold position but crack at the threaded neck during a higher-load test. Define separate acceptance criteria for movement, permanent deformation, cracking, thread damage, and retained function.
What Should Buyers Measure Before Approving a Swivel Joint?
Buyers should measure finished-part mounting fit, pivot alignment, axial and radial play, adjustment torque, holding performance, and condition after cycling. Each checkpoint needs an agreed method and acceptance limit tied to the mating assembly and service load.
| Checkpoint | Verification method | Approval criterion |
|---|---|---|
| Mounting threads | Finished-part thread gauges and mating-part trial. | Specified fit, engagement, and no premature bottoming. |
| Pivot geometry | Datum-based bore and alignment measurement. | Drawing limits met without selective fitting. |
| Joint play | Indicator measurement under a defined reversing force. | Axial and radial movement within agreed limits. |
| Adjustment torque | Measure breakaway and running torque across travel. | Both remain within the specified operating window. |
| Static holding | Apply the agreed moment at the worst orientation. | Angular drift stays below the limit during dwell. |
| Cycle durability | Cycle at defined load, speed, and angular travel. | Post-test holding, torque, and play remain acceptable. |
| Finish and wire path | Check coating thickness, edges, and cable clearance. | No interference, sharp edges, or insulation pinching. |
Do not impose tight tolerances everywhere. Identify functional datums and calculate the stack affecting fit, clearance, and friction preload. Clearance between a pin and bore depends on both diameters and their form and alignment. A nominal dimension alone does not control wobble or binding.
Run Load and Cycle Tests That Represent Installation
Use a fixture that reproduces the mounting face, thread engagement, and installation tightening torque. An overly rigid clamp around the joint body can bypass the mounting connection and produce a misleading pass. Record fixture geometry, load direction, lever arm, joint angle, dwell time, and environmental conditions.
Measure angular position before loading, during the dwell, and after unloading. This separates slip under load from residual movement or deformation. For a locking design, specify the locking input; for a friction-adjustable design, test at its intended assembly setting. Do not retighten between measurements unless the procedure explicitly permits it.
Cycle testing should reproduce the intended travel and operating mechanism. A joint designed to be unlocked before repositioning should not be repeatedly forced while locked. Define cycle count from expected use and qualification requirements, then recheck holding moment, breakaway torque, running torque, and play. Excessive test speed can heat friction components and distort results.
Use separate specimens for destructive strength testing where necessary. Proof loading, endurance testing, and failure testing answer different questions; report them separately rather than combining them into one unexplained load capacity figure.
Hidden Material, Finish, and Assembly Risks
Common production failures include burrs that score friction surfaces, misaligned bores that bind through part of the travel, and fasteners that loosen as the joint moves. Die-cast bodies require attention to local porosity and wall thickness around loaded bosses. Machined parts still need verification of thread engagement and tool marks at stressed transitions.
Inspect after finishing. Plating adds material to mating surfaces, while anodizing changes dimensions through oxide growth; powder coating can obstruct seats or threads if masking is inconsistent. The dimensional effect depends on the specified process and thickness. Raw-part measurements cannot establish final assembly fit.
Lubricant migration onto a friction interface can reduce holding performance. Washer material changes can alter creep, wear, and temperature response. Assembly tightening torque is also an imperfect proxy for clamp force because thread friction varies. Control lubrication, hardware, assembly sequence, and torque method, then verify the resulting joint performance.
Frequent inspection mistakes include measuring adjustment torque only once, checking play without a defined force, and reporting averages that conceal failing specimens. Require individual results and investigate outliers before approval.
Practical Sample-to-Production Approval Checklist
- Freeze the specification: Confirm drawing revision, materials, finish, mounting geometry, load cases, and acceptance limits.
- Identify the samples: Record lot, tooling or cavity where relevant, process route, and any manual corrections.
- Check finished dimensions: Include mating-part assembly, thread fit, pivot clearance, and coating-sensitive features.
- Validate performance: Review individual static-load and cycle results, including post-test torque and play.
- Resolve deviations: Document corrective actions and retest affected characteristics before release.
- Control production transfer: Retain identified reference samples and approve the inspection plan and change-notification rules.
Agree sample quantities and production sampling according to risk, process variation, and test destructiveness. One successful sample demonstrates feasibility, not batch consistency. Cosmetic sampling plans should not substitute for an appropriate functional verification plan.
What a Reliable Factory Should Provide
A reliable supplier should provide a revision-controlled dimensional report, relevant material documentation, finish specification, and a test report identifying specimens, equipment, methods, and results. “Passed internal testing” is insufficient if the load arm, dwell time, and movement limit are missing.
The factory should also explain how critical characteristics are maintained: machining datums, tool-wear checks, coating or masking controls, washer specifications, and assembly settings. Measuring equipment should have suitable calibration and resolution. Where operator technique significantly affects results, request evidence that the measurement method is repeatable.
Clarify which checks occur during production and which are periodic qualification tests. Request notification before changes to materials, finishing suppliers, friction components, or assembly methods that could invalidate approval.
Involve the Factory Before the Design Is Frozen
Early review is valuable when the load offset increases, installation space limits thread engagement, or wiring must pass through the pivot. Share the mating-part drawing and actual load geometry—not only the joint drawing. The factory can assess tolerance stacks, masking needs, tool access, and whether the selected joint architecture can achieve the required holding and adjustment window.
Approve Measurable Performance, Not Just a Sample
A sound swivel joint approval process for B2B buyers links finished-part tolerances to installed load performance and repeatable production controls. Before releasing an order, confirm that the test setup represents your application and that the supplier can reproduce the approved assembly. For a new sourcing project, review relevant swivel joint products or discuss custom machining, finishing, and testing requirements with the manufacturing team.
If your project involves finish, tolerance, or custom production questions, the next useful step is to review lighting hardware sourcing support before finalizing drawings, samples, or mass-production requirements.
 Floor Lamp Sets
 Wall Lamp Sets
 Table Lamp Sets
 Custom Hotel Parts
 Custom Made Parts
 Panels
 Tubes
 Universal joints
 Machined Parts